Generated approach charts for major New Zealand ports. These prototype charts show bathymetry contours, navigation features, and recommended approach tracks.
CAUTION: These charts are generated from publicly available data for planning reference only. They are NOT substitutes for official LINZ hydrographic charts. Do not use for navigation.
Wellington Harbour (Port Nicholson)
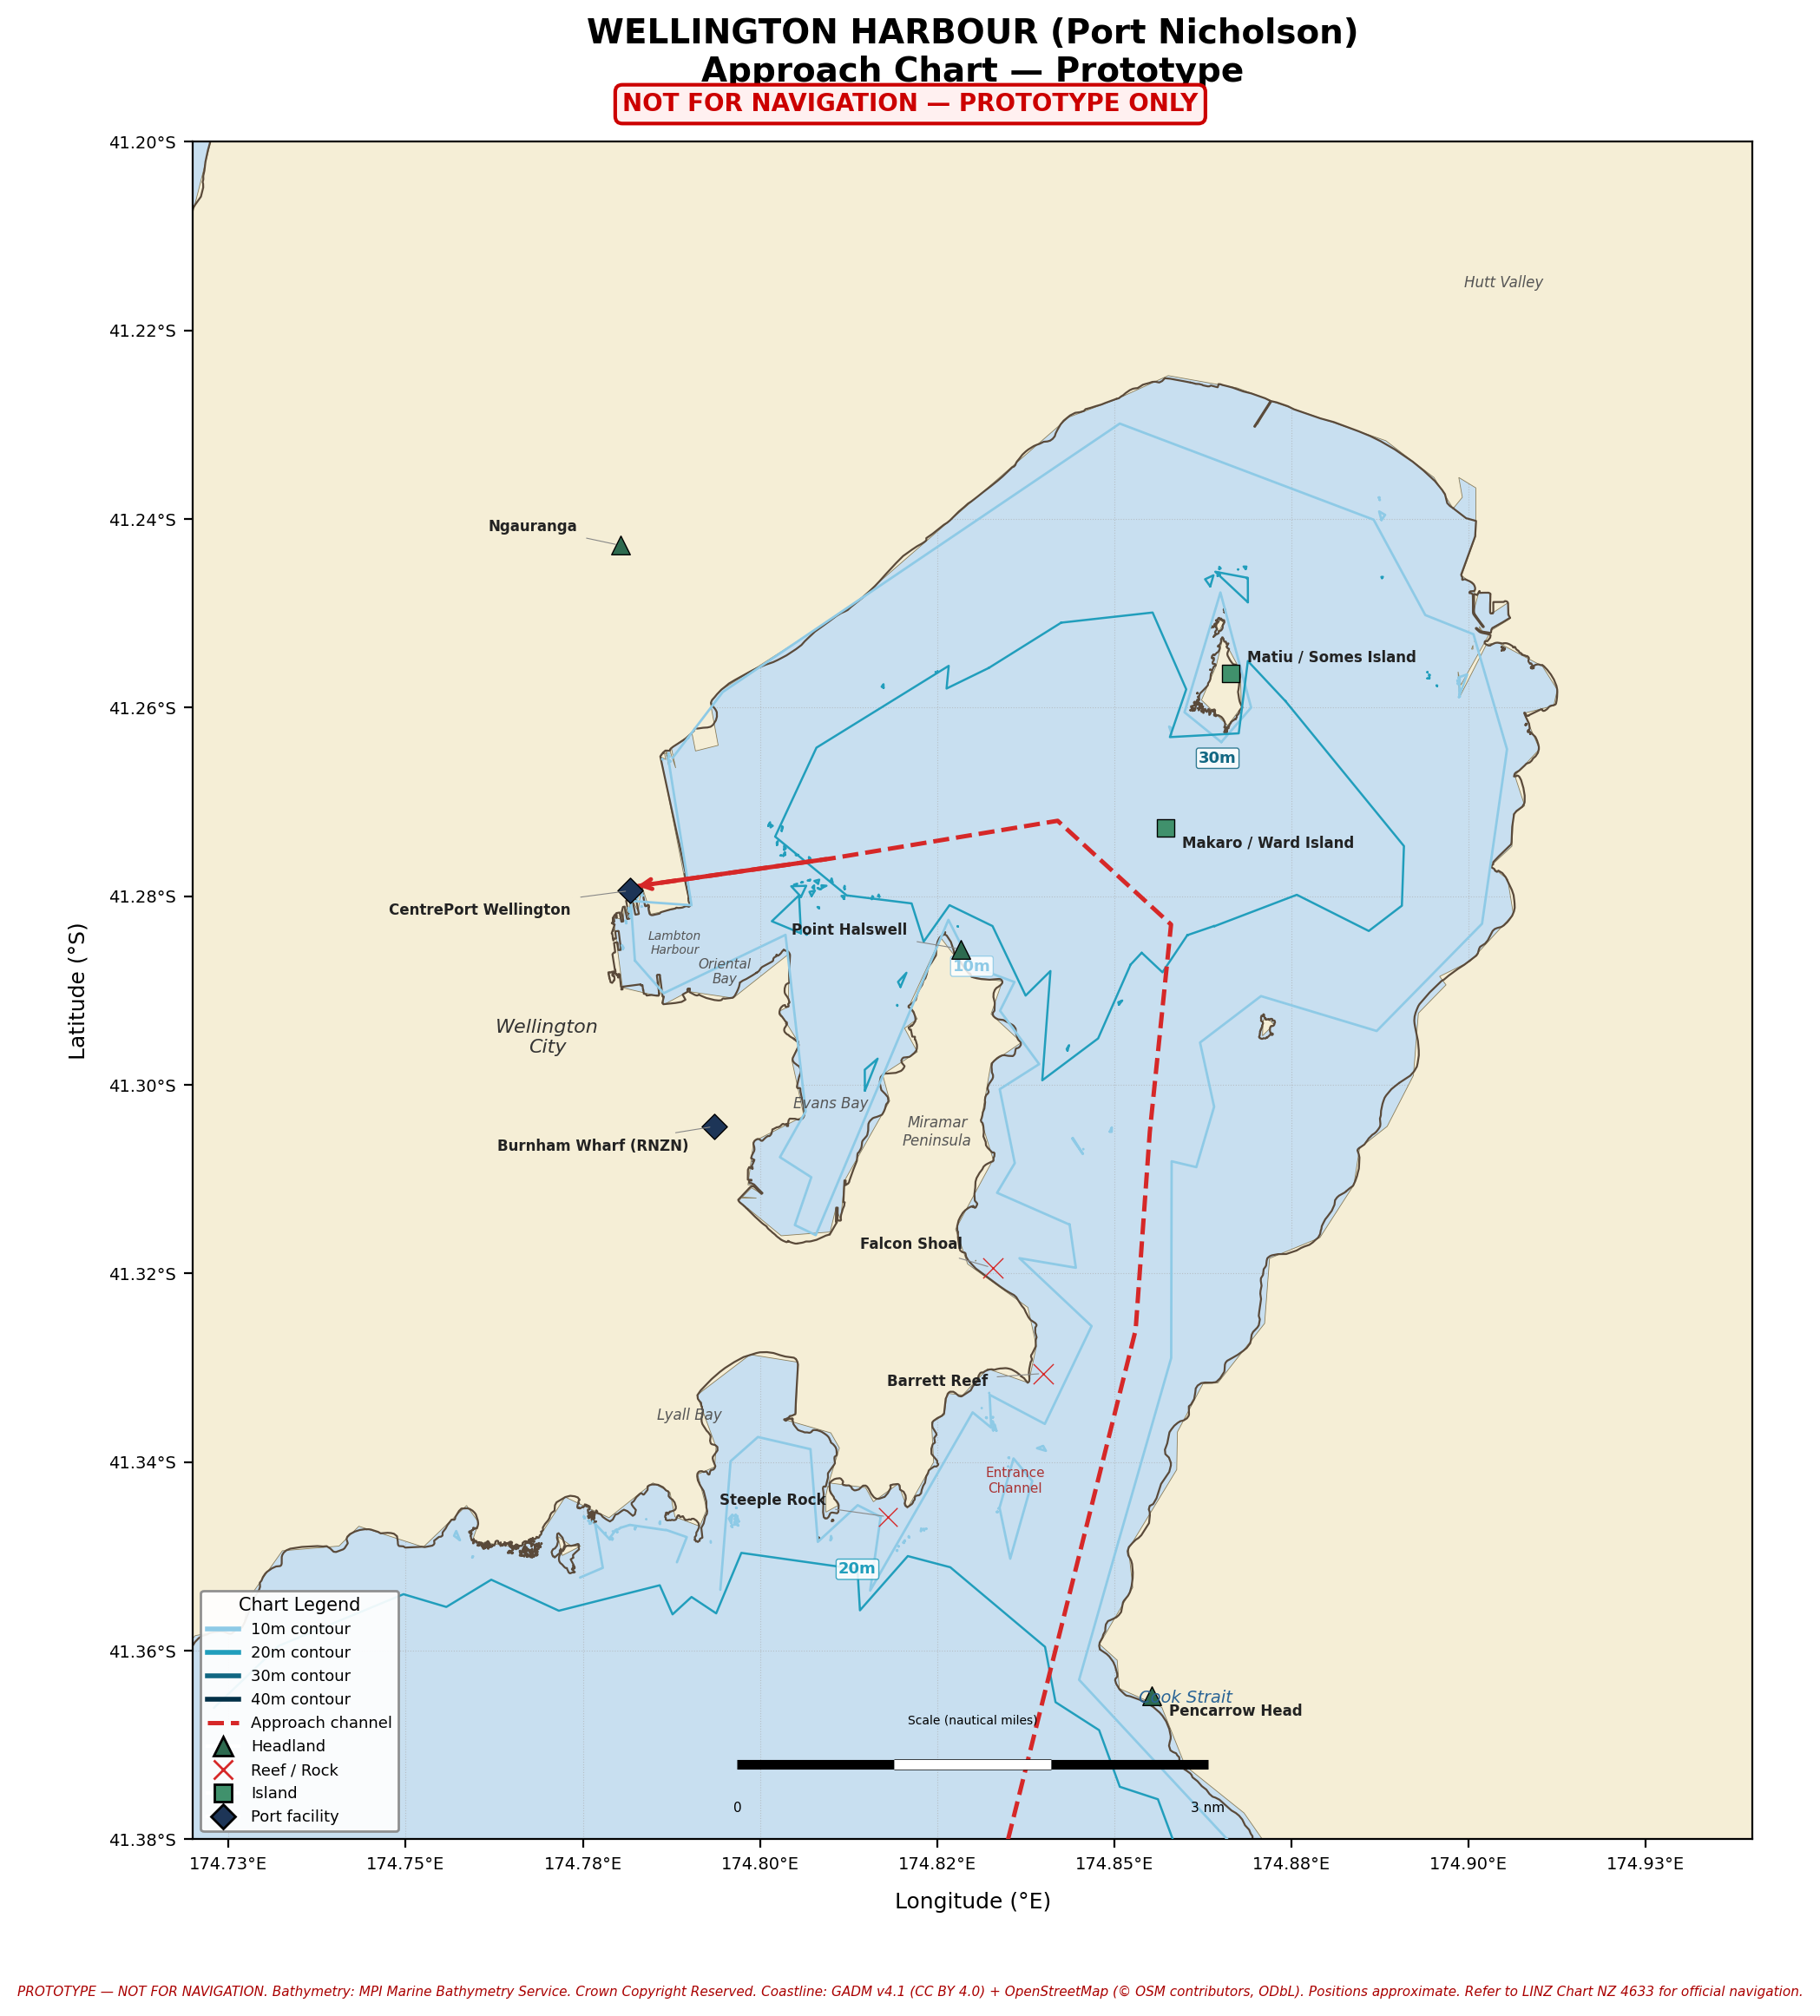
Wellington Harbour (Te Whanganui-a-Tara) is the principal port of the lower North Island. The approach from Cook Strait passes between Pencarrow Head to the east and Baring Head to the south. Barrett Reef lies in the centre of the entrance and must be avoided — it was the site of the TEV Wahine disaster in 1968. The dredged channel leads north past Matiu/Somes Island to CentrePort, which handles container, bulk cargo, and inter-island ferry traffic. Tidal streams in the entrance can reach 2 knots on spring tides.
Auckland (Waitemata Harbour)
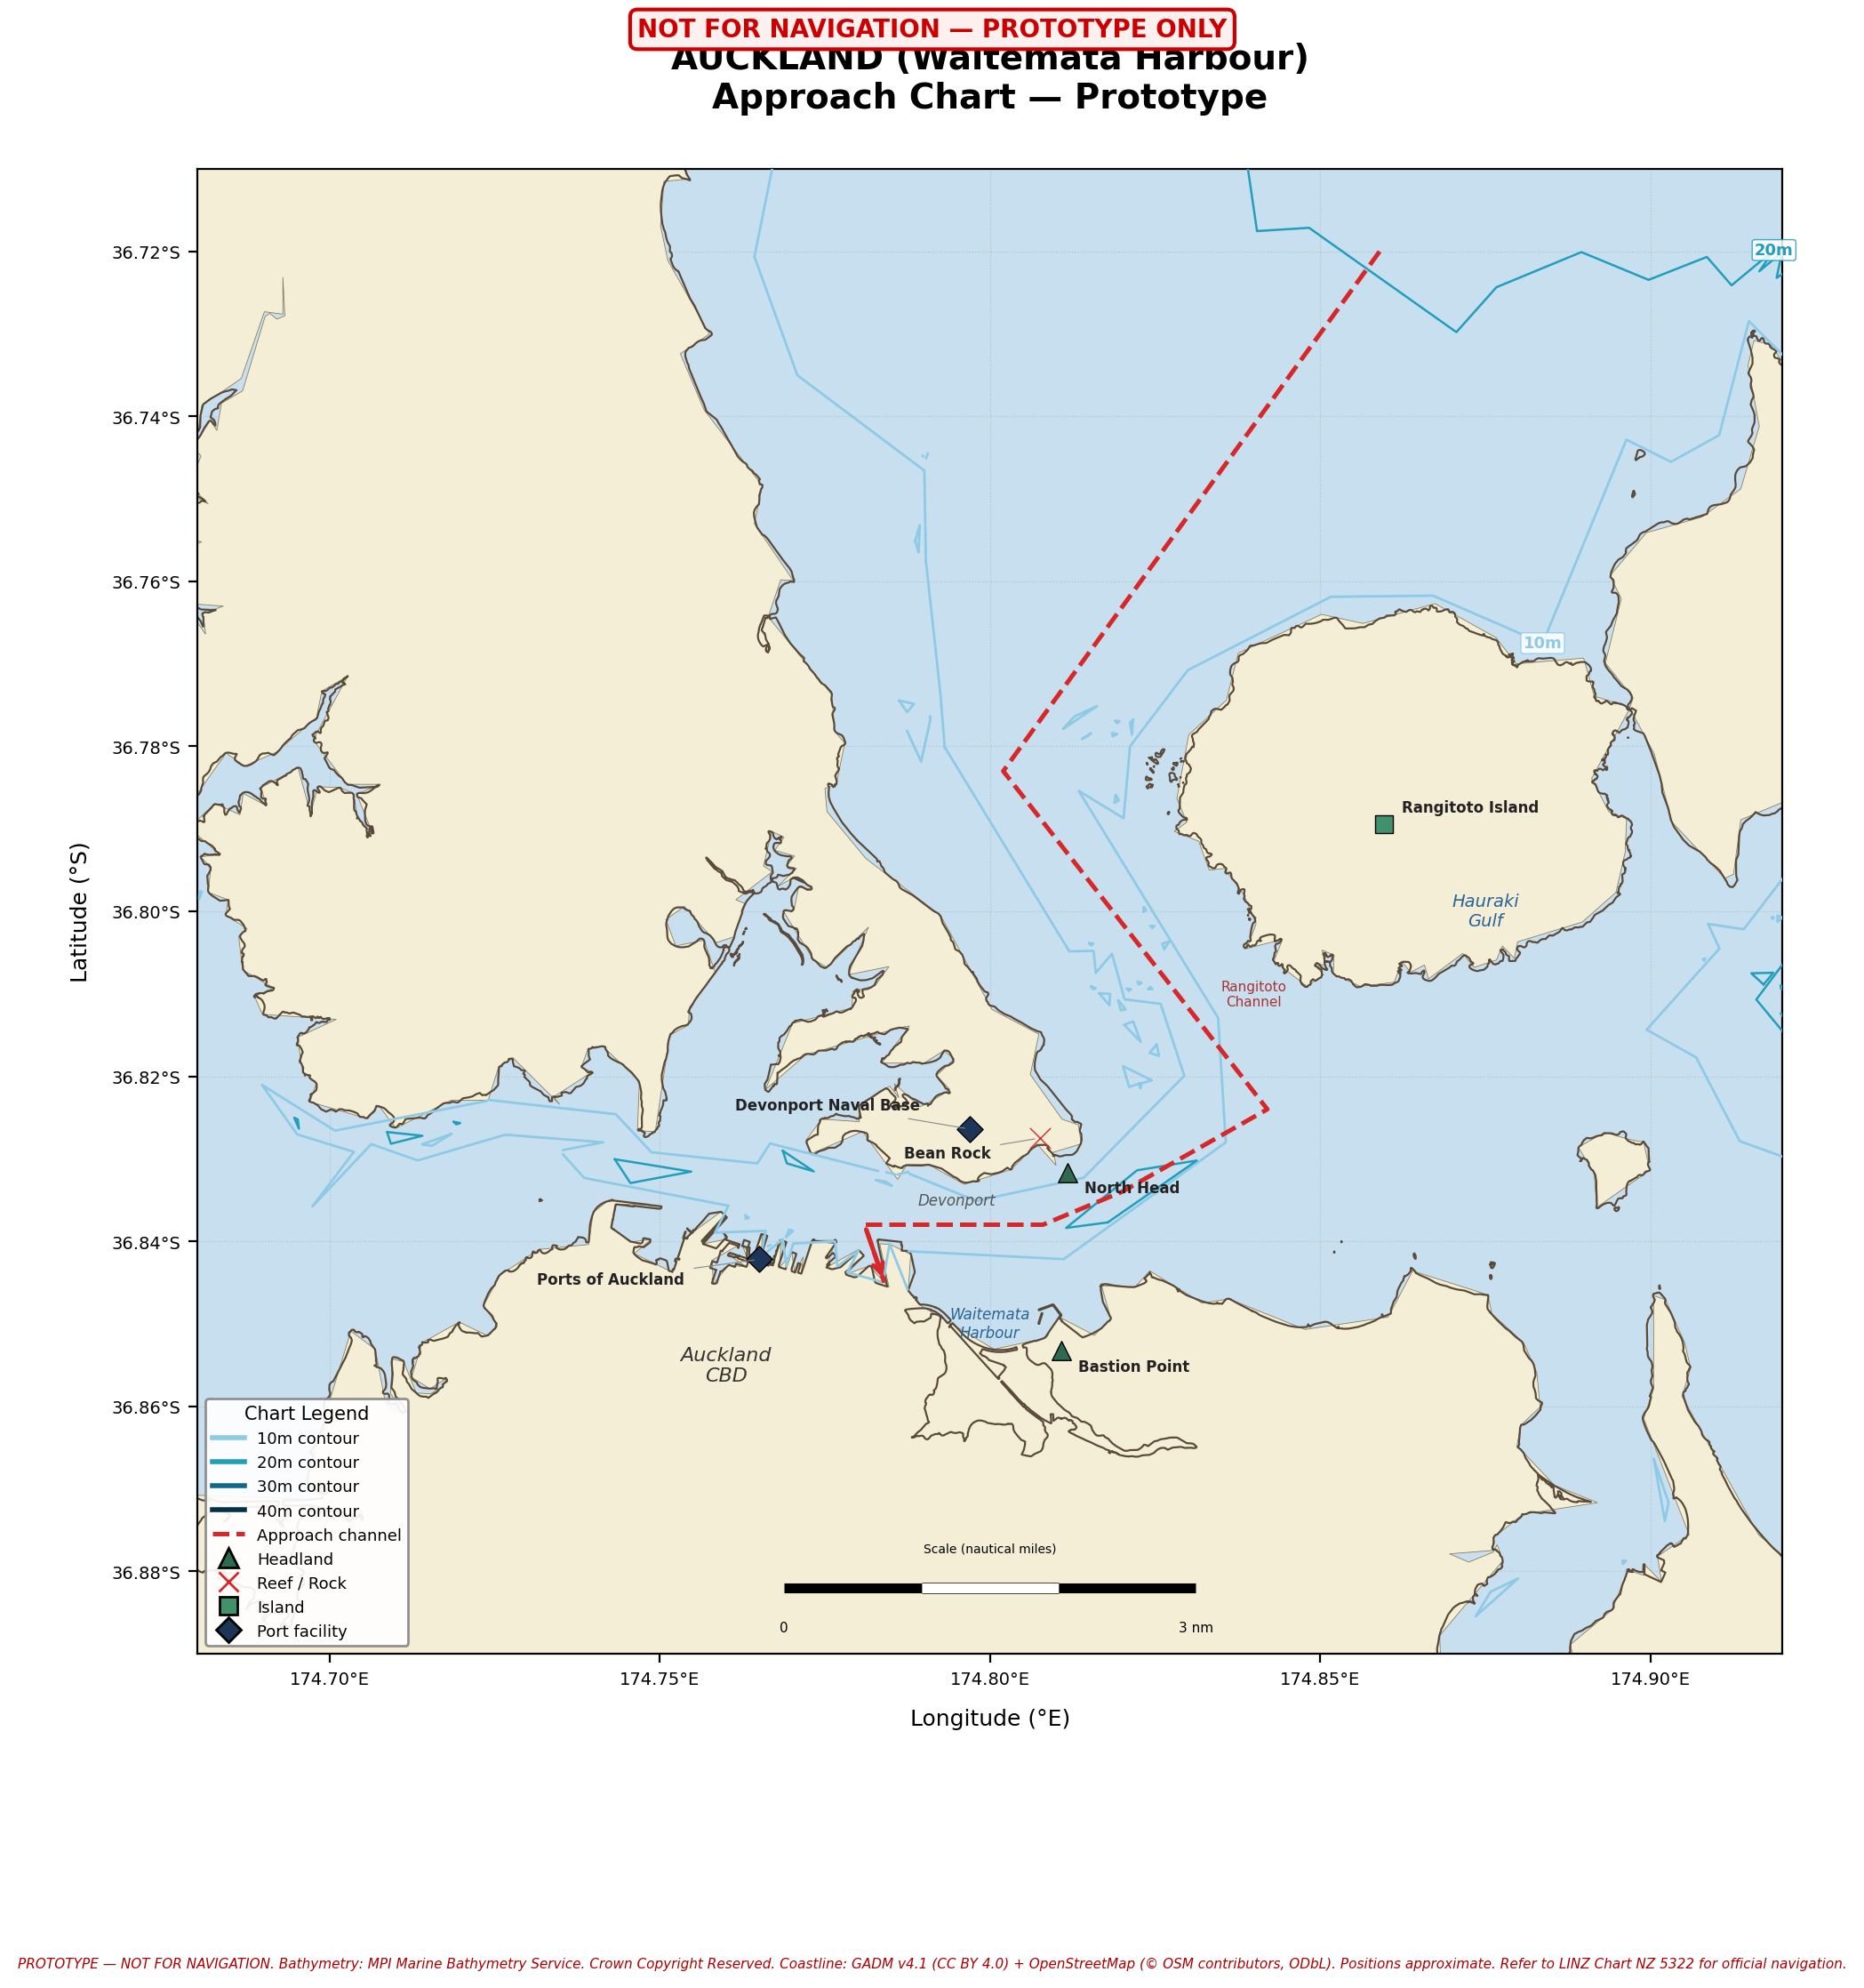
The Waitemata Harbour serves Ports of Auckland, the country’s largest container port. The main deep-water approach runs through the Rangitoto Channel between Rangitoto Island and North Head. Bean Rock reef lies at the harbour entrance and is marked by a lighthouse. The inner harbour narrows between North Head (Maungauika) and Bastion Point before opening into the main commercial anchorage. The Devonport Naval Base sits on the North Shore opposite the port. Strong tidal flows occur in the entrance, especially on ebb tides, and require careful timing for larger vessels.
Lyttelton Harbour
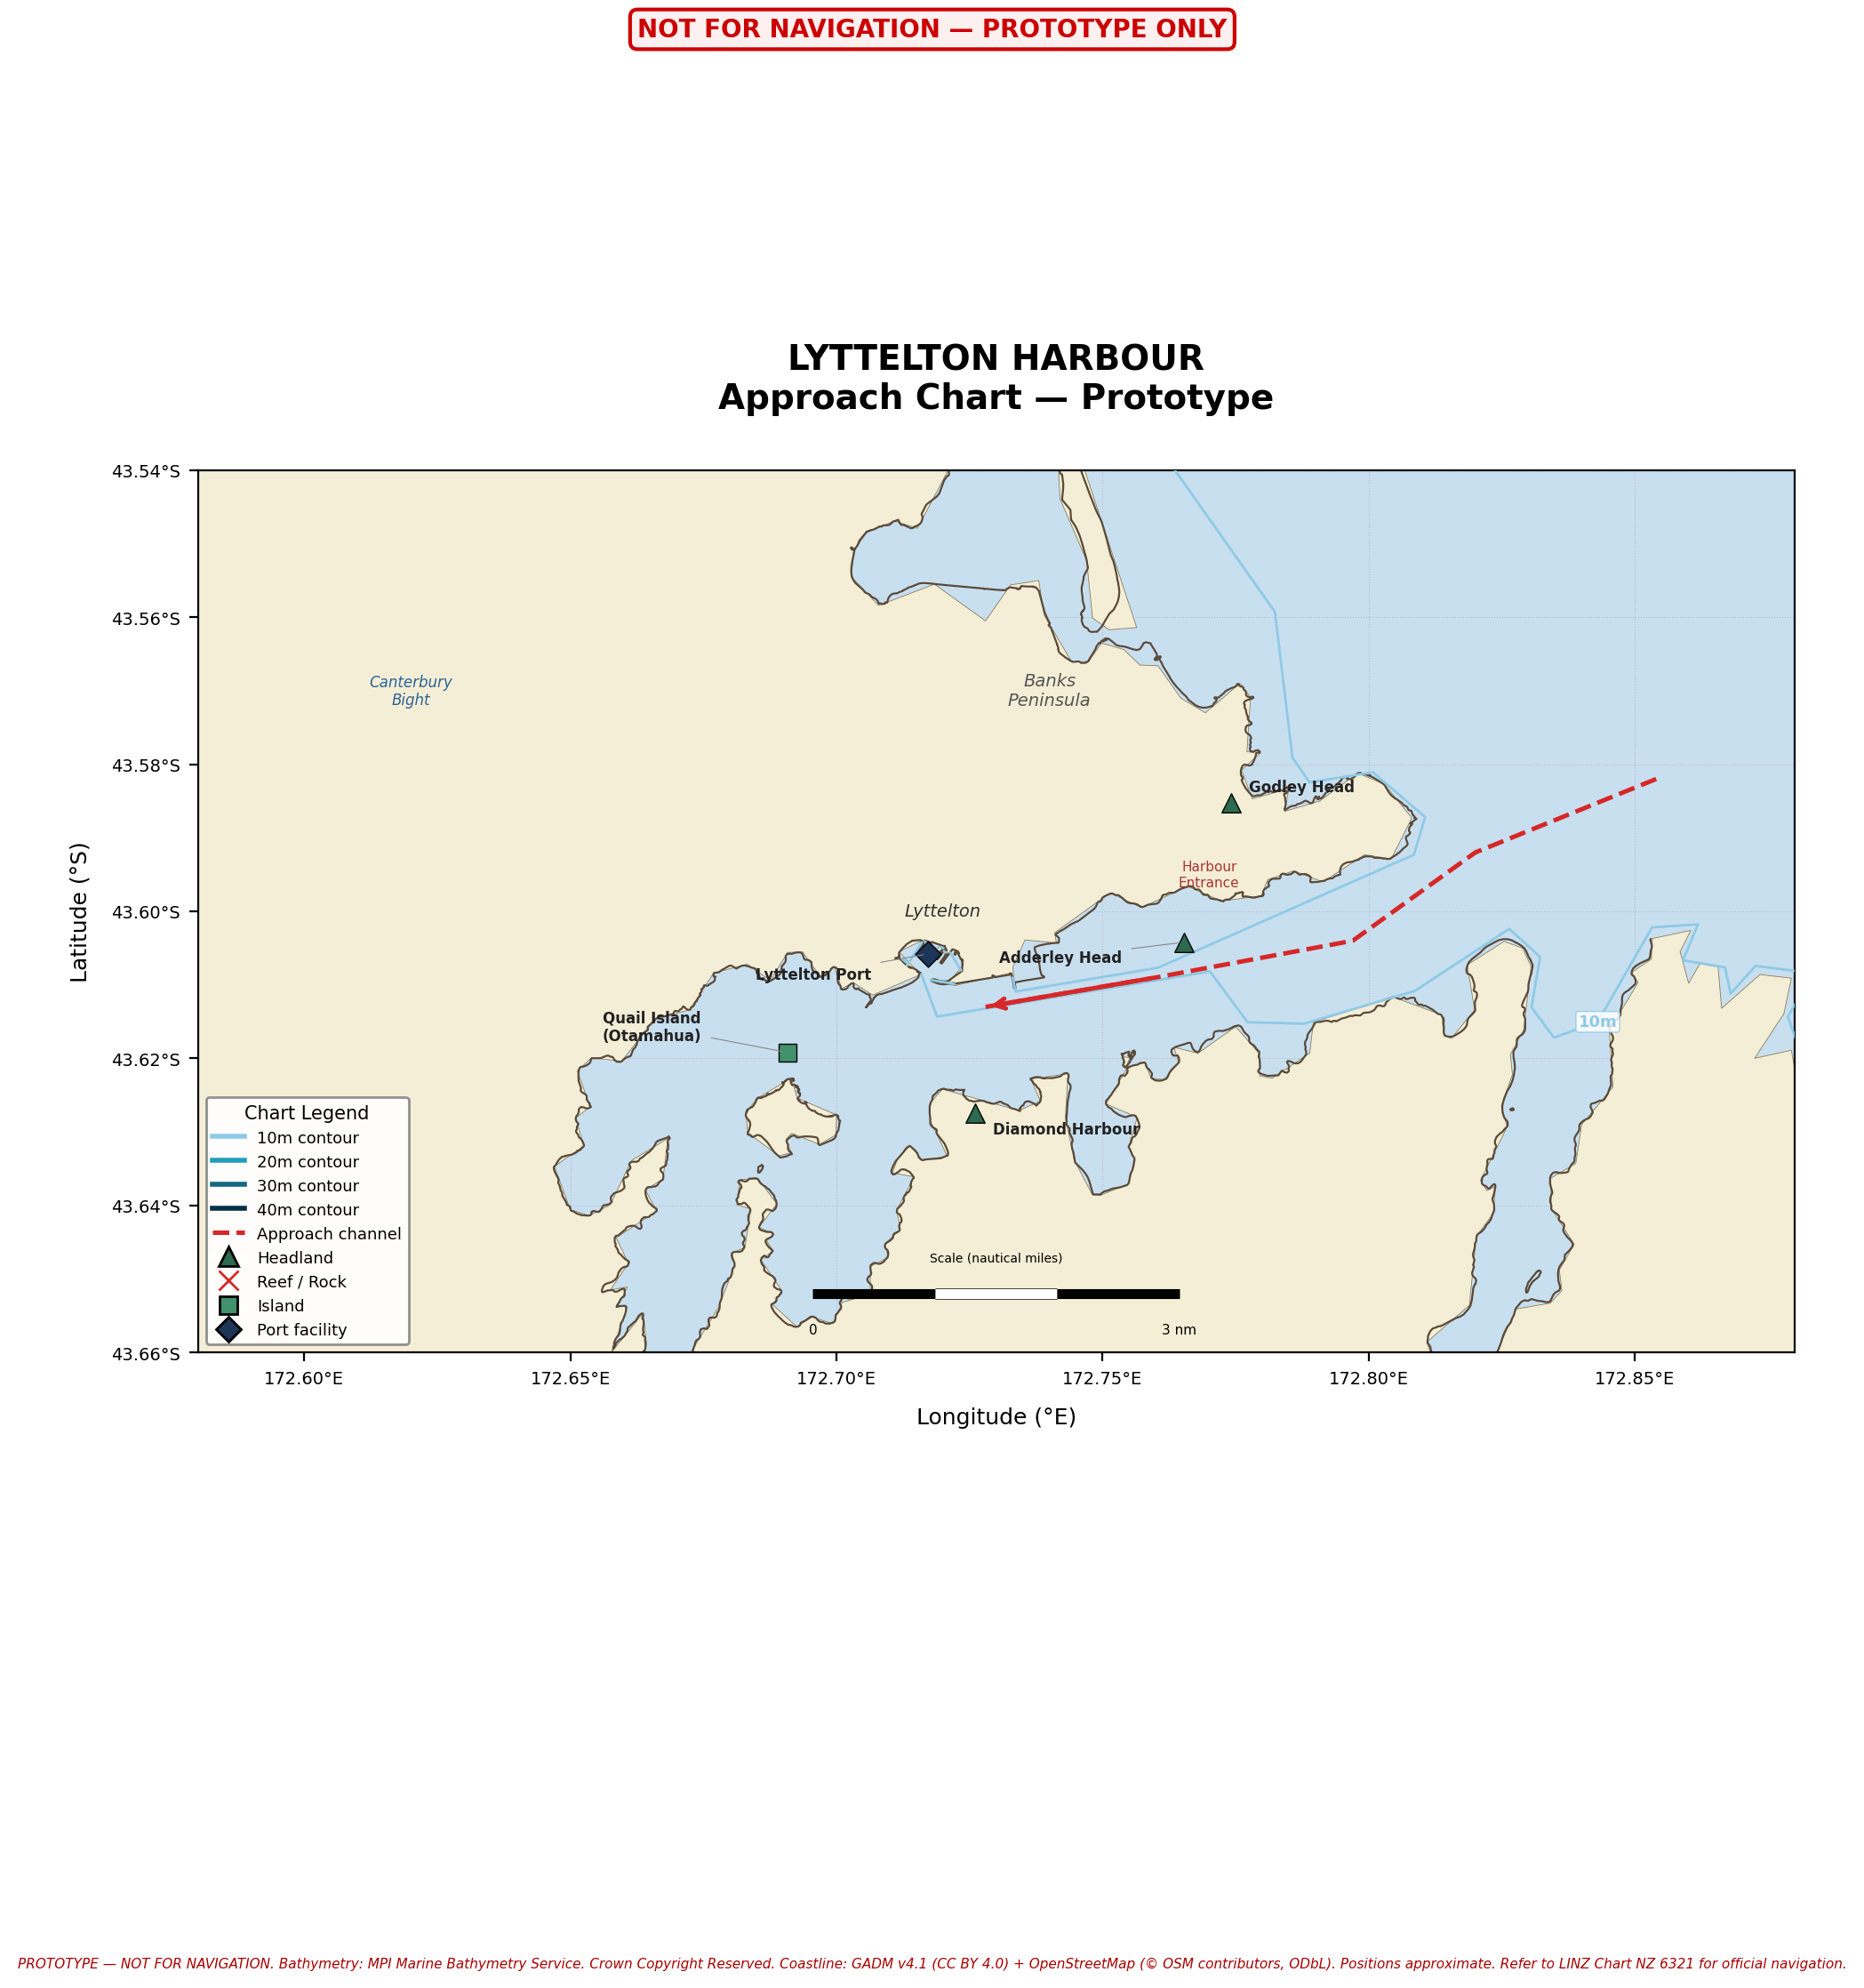
Lyttelton is the port of Christchurch and the largest on the South Island’s east coast. The harbour occupies a drowned volcanic crater within Banks Peninsula. Approach is from the northeast through a relatively narrow entrance between Godley Head (northern side) and Adderley Head (southern side). Quail Island (Otamahua) sits in the inner harbour. The port handles coal exports, container traffic, and cruise ships. The harbour is well-sheltered once inside the heads, though a strong northeast swell can make the approach uncomfortable. Diamond Harbour lies on the southern shore opposite the port.
Tauranga Harbour
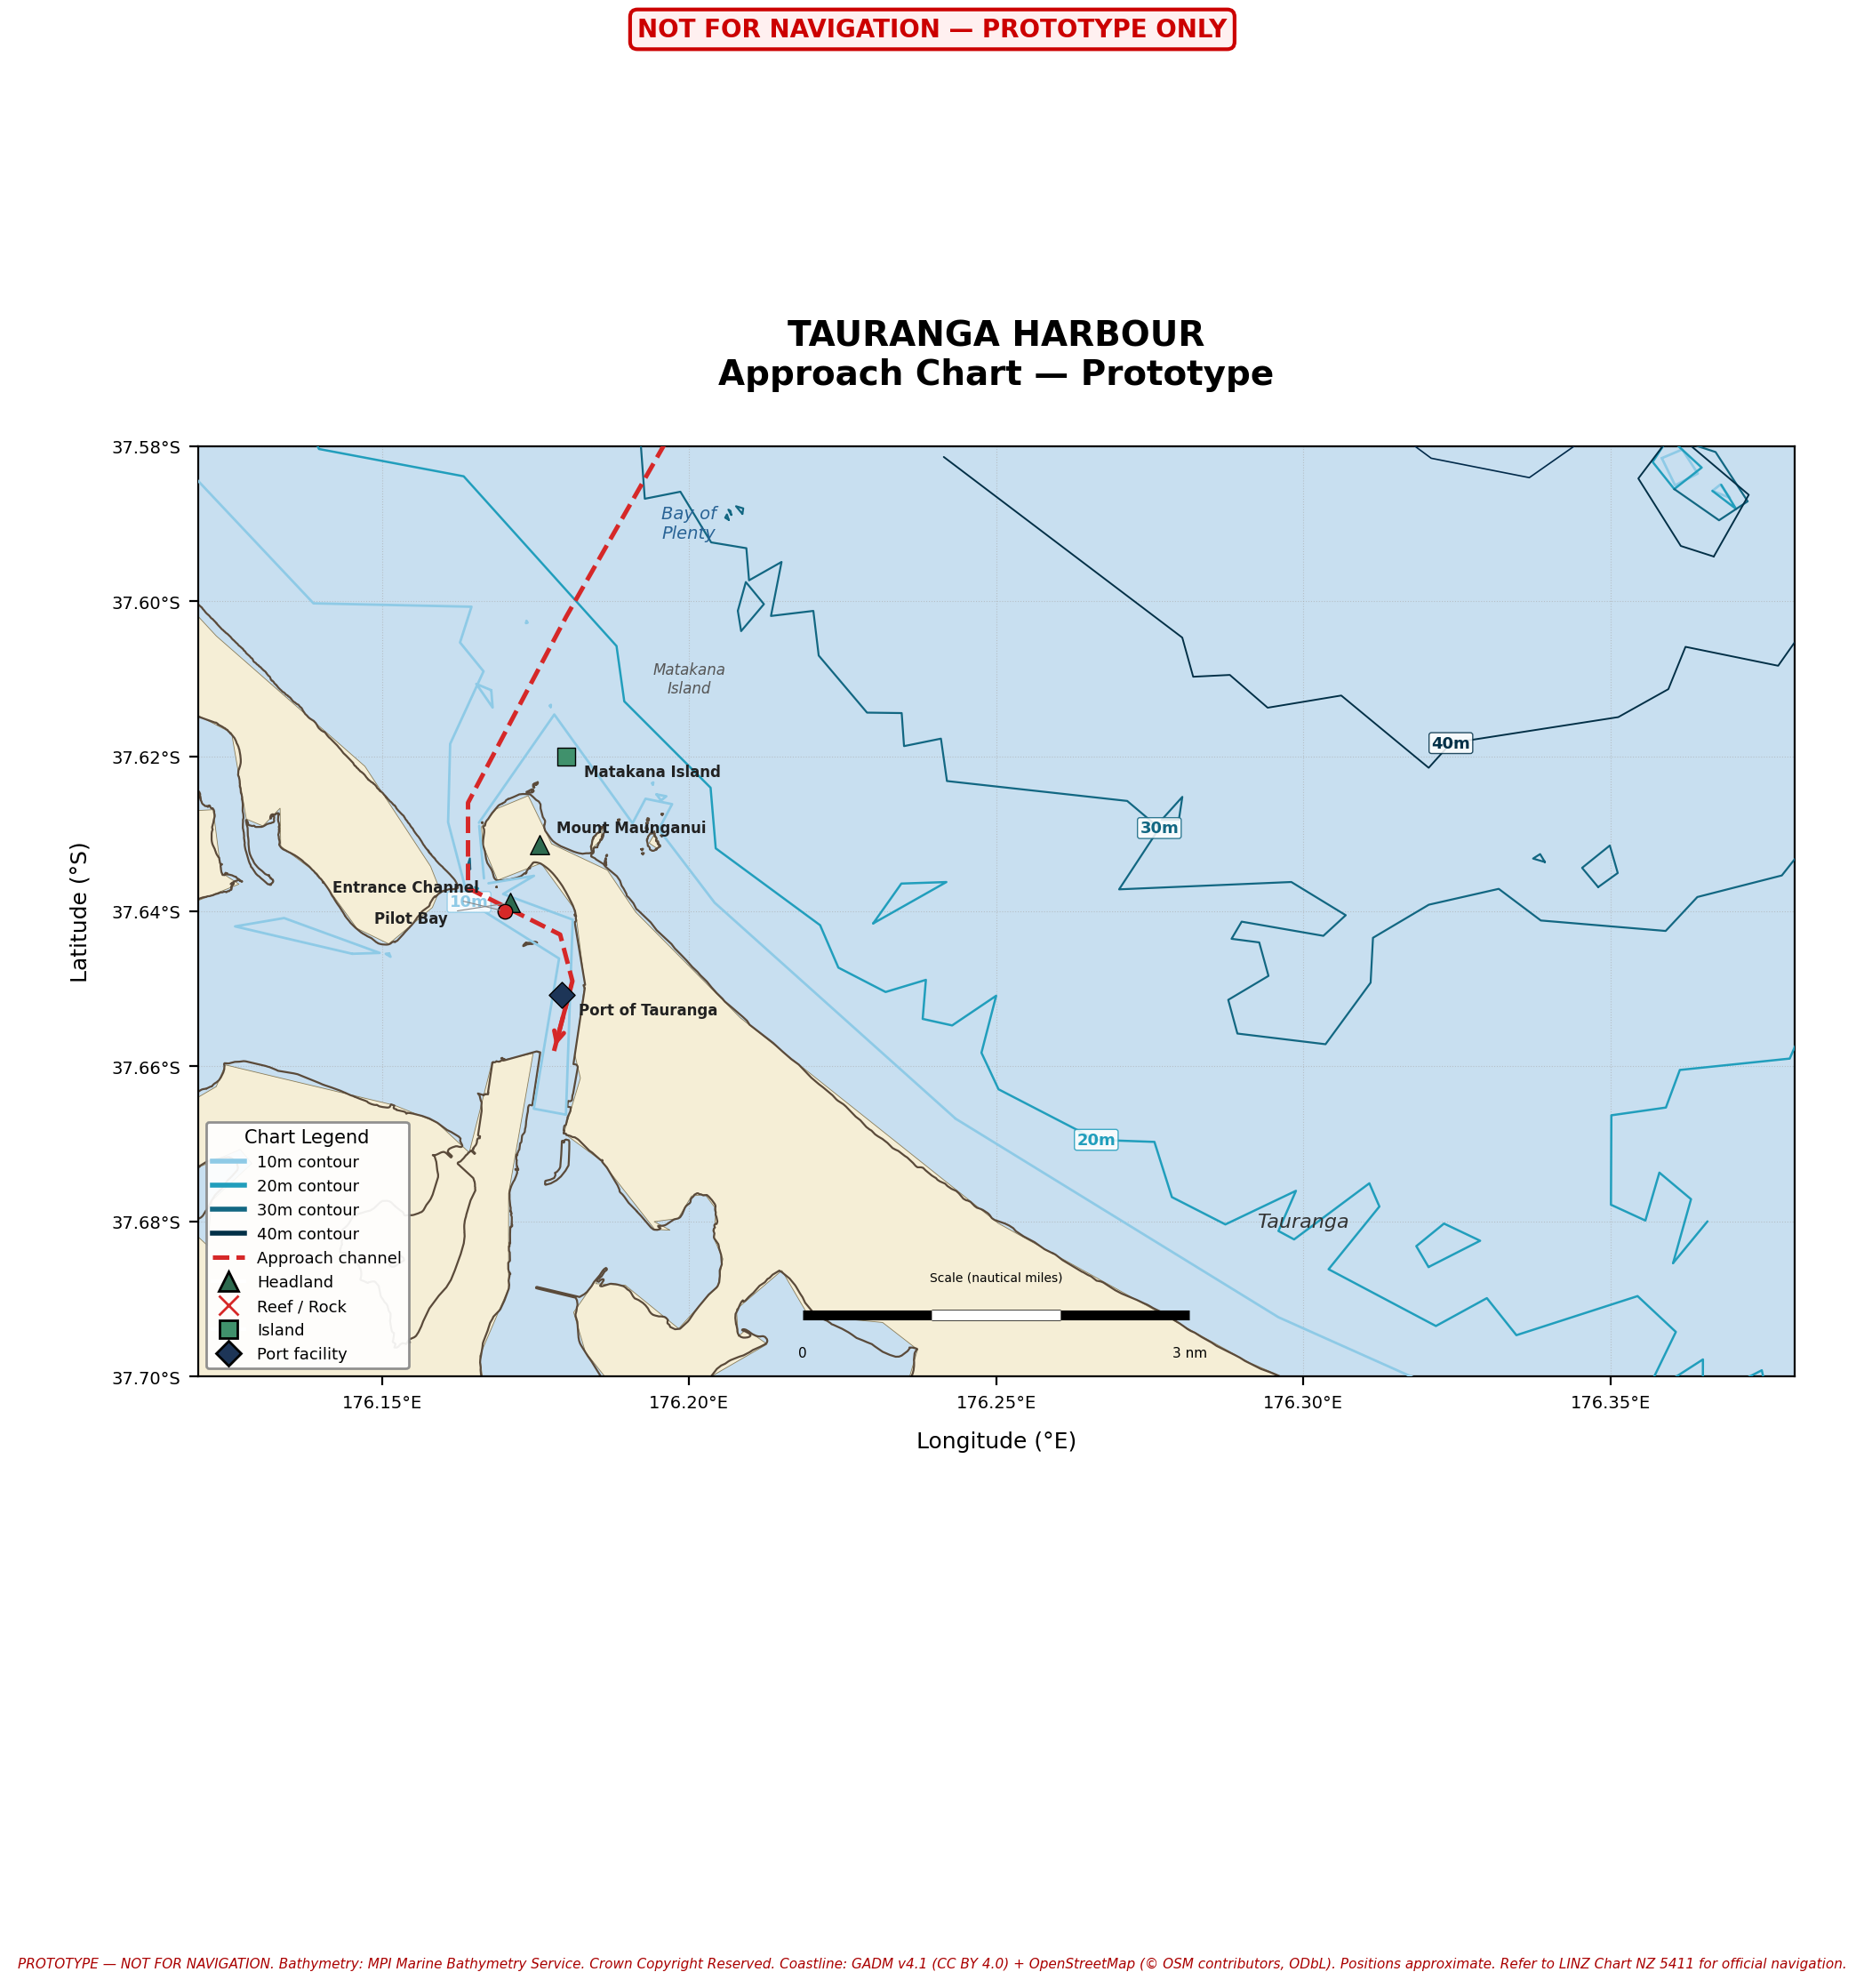
The Port of Tauranga is New Zealand’s largest export port by cargo volume, handling logs, dairy products, and container freight. The harbour entrance lies between Mount Maunganui (“The Mount,” 232 m) to the southeast and Matakana Island to the northwest. The entrance channel is dredged but subject to strong tidal currents that can exceed 3 knots on springs. Pilot Bay provides sheltered anchorage east of The Mount. The port berths extend along the Tauranga side of the harbour south of the entrance. Vessels approaching from the Bay of Plenty must allow for the cross-currents at the entrance bar.
Otago Harbour (Port Chalmers)
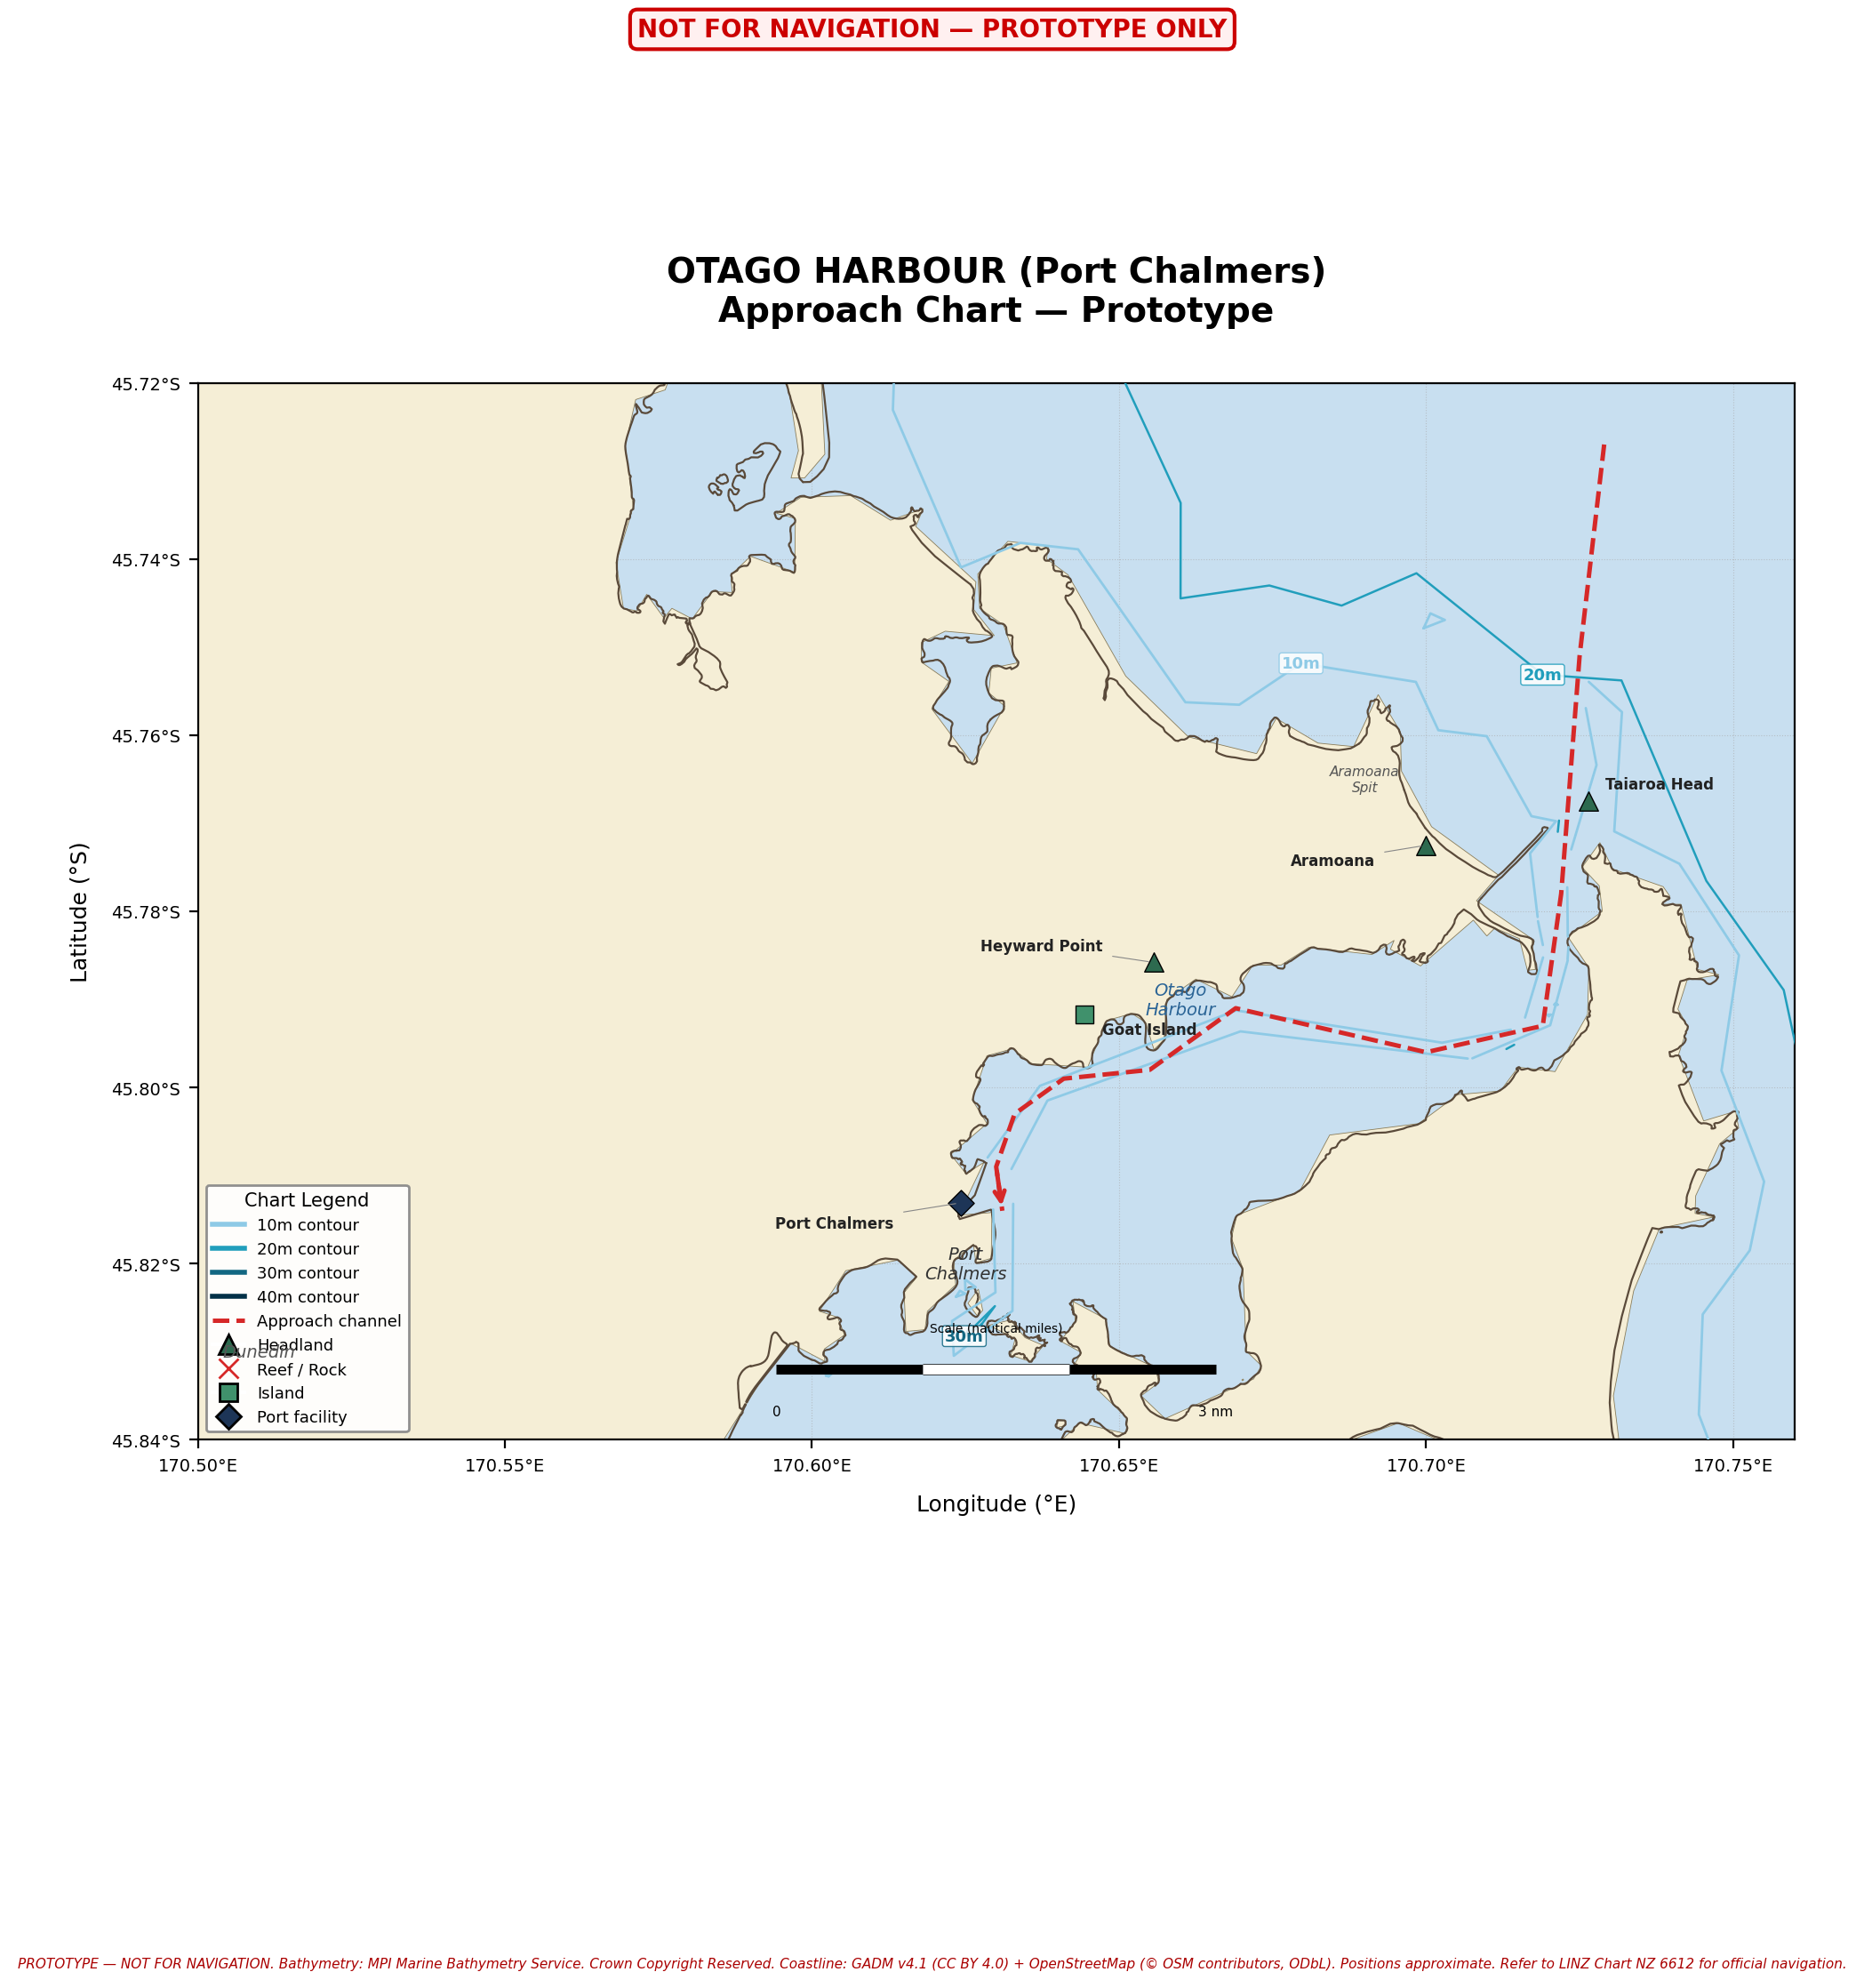
Otago Harbour is a long, narrow inlet running from Port Chalmers and Dunedin out to the open sea at Taiaroa Head, home to the only mainland breeding colony of northern royal albatross. The entrance between Taiaroa Head and Aramoana Spit is narrow and subject to significant tidal flows. The channel runs approximately 13 km from the entrance to Port Chalmers, passing Heyward Point and Goat Island. Port Chalmers handles container, bulk, and cruise traffic for the Otago region. The approach requires careful navigation through the long channel, with the strongest tidal streams at the entrance narrows.
Data sources: MPI Marine Bathymetry Service; Crown Copyright Reserved. GADM v4.1 (CC BY 4.0); LINZ chart positions (approximate).